If a hardware upgrade is nowhere near the horizon, then the best Tarkov settings for low end PCs will be a lifesaver.
Not everyone has thousands of dollars to spend on their gaming rig. If you’re like me who started of small and have to work with what you currently have, you’ll find these optimizations divine.
I didn’t want to give up on the game I loved just because my PC wasn’t top-tier. After months of tinkering with settings, comparing different tweaks, and surviving plenty of slideshow gunfights, I finally dialed in a configuration that keeps Escape from Tarkov looking clean without frying my system.
If you’re running a modest setup and still want to enjoy the thrill of Tarkov, this guide is built from my own firsthand trial-and-error journey of humble beginnings.
Game Settings
I initially overlooked this part, thinking the real gains would come from graphics, but these settings play a role too.
- Double Click to Use: I keep this “In Raid Only” to avoid gulping moonshine from stash.
- FOV (Field of View): I stick with 65. Higher values gave me a wider perspective but messed up scope visibility.
- Head Bobbing: I set this to 0.2—any higher and it feels like you’re running on a boat.
- Notifications: I only leave malfunction notifications on, the rest are off to reduce clutter and distraction.
- RAM Cleaner: I disable automatic RAM cleaner, it doesn’t help much and can spike loading times.
These tiny changes collectively improve comfort, which goes a long way on a low-end setup.
Also Read: Escape From Tarkov Best Settings
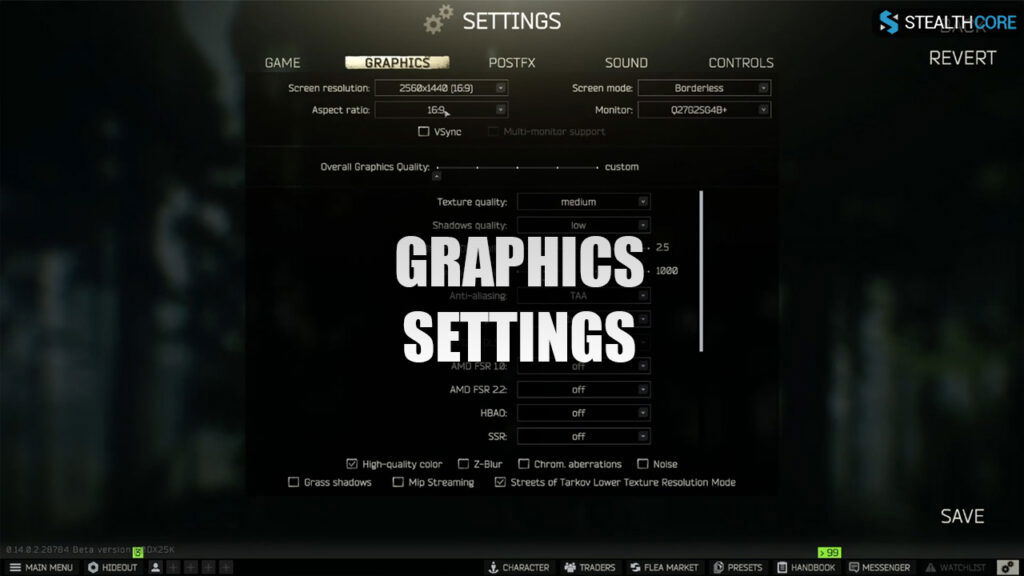
Graphics Settings
This is the core of finding the best Tarkov settings for low end PC, and trust me, this is where most of my time was spent.
- Resolution: 1440p might sound high, but I play on it with a 16:9 aspect ratio. If your system struggles, drop to 1080p.
- Textures: Medium. Low textures made everything look mushy, and medium balances visuals and performance.
- Shadows: Off—huge FPS saver.
- Object LOD Quality: 2.5. Anything higher tanks performance.
- Overall Visibility: 1000—this is critical. Less than this and enemies can disappear, more than this wastes resources.
- Anti-Aliasing: Set to TAA. It’s better than off without hammering frames.
- Resampling: 1x Off. No need for any upscale/downscale shenanigans.
- Sharpness: 0.6. Keeps things from looking like Vaseline was smeared on the screen.
Settings all OFF below:
- SSR
- Anisotropic Filtering
- NVIDIA Reflex
- HBAO
- Z-Blur
- Chrom. Aberration
- Noise
- Grass Shadows
- Enhanced Shadows
Extra tip: Streets of Tarkov? Turn on Lower Resolution Mode. It’s still rough, but this is the only way I can even load into Streets.
Also Read: Best PostFX Settings in Tarkov
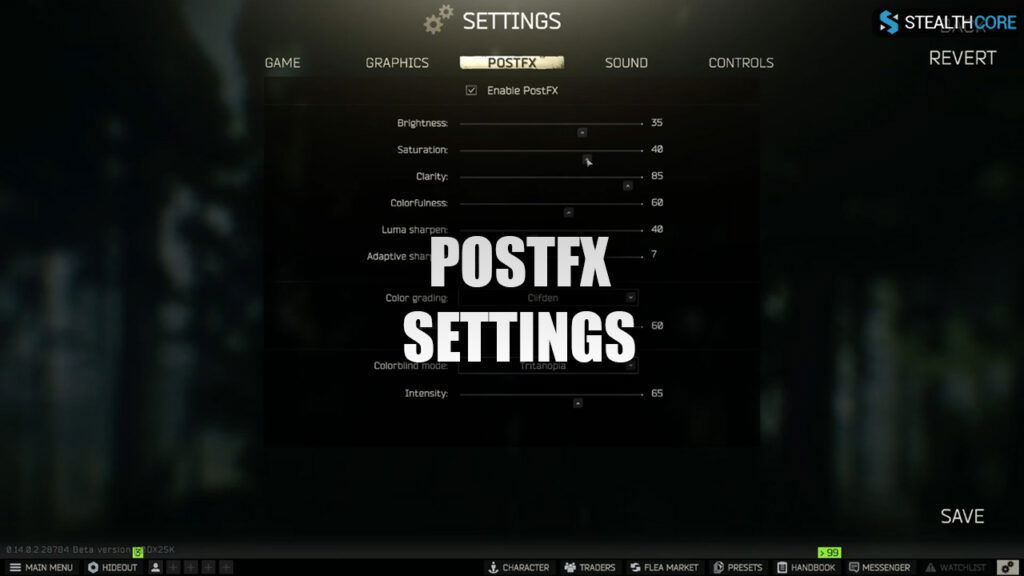
PostFX Settings
Despite the low graphics, PostFX can trick your eyes into thinking the game looks good—and it really helps with visibility too.
Here are the settings I currently use:
- Brightness: 35
- Saturation: 40
- Clarity: 85
- Colorfulness: 60
- Luma Sharpen: 40
- Adaptive Sharpen: 7
Color settings:
- Color Grading: Clifton
- Intensity: 60
- Color Blind Mode: Tritanopia
- Intensity: 65
I played around with these for hours, sometimes testing them raid after raid. Eventually, I landed on this combo, and it gave my screen a crisp and clear look even in darker areas like Interchange.
Also Read: How to Fix Stuttering in Tarkov
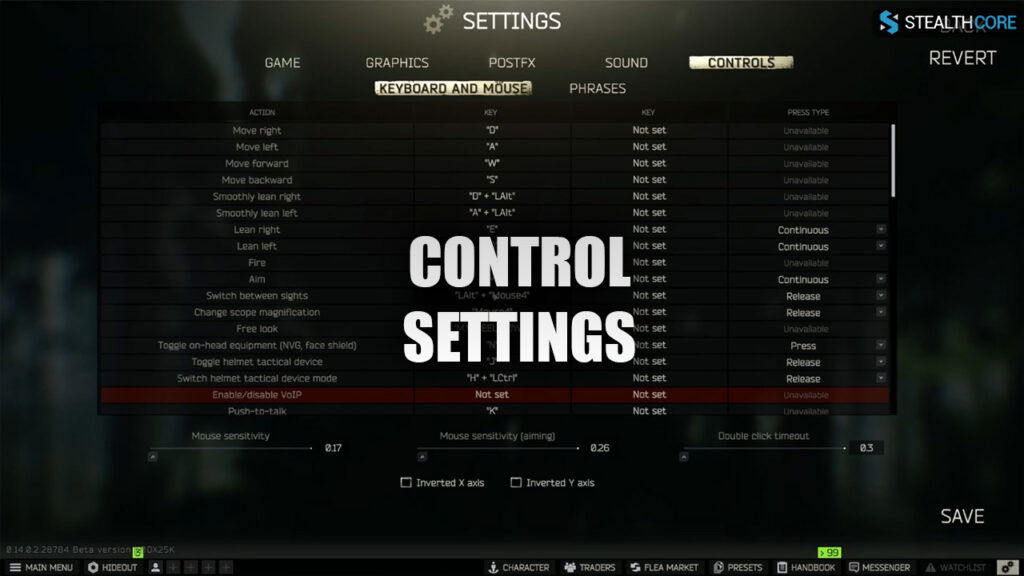
Keybinds & Controls
Even with the best Tarkov settings for low end PC, if your keybinds aren’t intuitive, you’re going to get caught fumbling in firefights.
Some tweaks that helped:
- ALT + Mouse 4 = Switch between sight modes
- Mouse 5 = Drop Item
- ALT + Mouse 5 = Scope Magnification Change
My mouse only has two side buttons, so I had to get creative. Having reliable keybinds makes scav looting and quick peeks far easier, especially when lag could strike at any moment.
Nvidia Control Panel
If you have an Nvidia GPU, there’s more you can tweak outside the game. I adjusted these settings to get smoother frame pacing:
- Image Sharpening: On
- Power Management Mode: Prefer Maximum Performance
- Low Latency Mode: Off (Tarkov doesn’t play well with it on)
- V-Sync: Off
I also bump the digital vibrance a bit to help visibility in darker spots like night Factory or Interchange.
This adds a bit of vibrance and sharpness that PostFX alone doesn’t provide, especially when the map is dimly lit.
Prioritize System Resources
All the in-game settings in the world won’t help if Windows is eating RAM in the background. Here’s what I do before every Tarkov session:
1. Close background apps: Discord, Chrome, even game launchers. Tarkov is a hog.
2. Use Game Mode (Windows): Helps allocate resources properly.
3. Update GPU drivers regularly.
4. Set Tarkov’s priority to “High” in Task Manager for better performance.
And yes, a clean system matters. Once I started treating my PC like a sniper rifle (clean, efficient, ready to fire), Tarkov stopped stuttering as much.
My Recommended Build for Low-End PC Players
Here’s the full list of what I run today in summary, just in case you want a checklist:
- Resolution: 1080p or 1440p
- Textures: Medium
- LOD Quality: 2.5
- Visibility: 1000
- All visual fluff settings: OFF
- PostFX: See Section 3
- Keybinds: Personalize with limited buttons
- Background processes: Kill them all before raid
- Use Nvidia Panel: For vibrance boost
Even on my dated GPU, I’m hitting playable FPS in most maps. The best Tarkov settings for low end PC won’t make you a better player overnight, but they sure as hell give you the chance to compete.
Conclusion
Finding the best Tarkov settings for low end PC was honestly more stressful than some firefights. But once I fine-tuned everything, from in-game sliders to system settings, I started to enjoy Tarkov the way it was meant to be played: smooth, immersive, and deadly.
You don’t need a NASA rig to win those gunfights. You just need patience, a bit of testing, and the right mindset to keep optimizing. I hope my setup helps you make the most out of your own low-end PC experience.